

No-Bake Cookie Butter Cheesecake Bombs: A Delightful Dessert Experience
In the world of desserts, no-bake creations have surged in popularity, delighting dessert lovers with their simplicity and ease of preparation. No-bake desserts are particularly appealing because they eliminate the need for ovens, allowing even novice bakers to whip up something delicious with minimal effort. Among these delectable treats, cheesecake bombs stand out as a fun and innovative twist on traditional cheesecakes. These bite-sized delights encapsulate all the creamy indulgence of cheesecake in a playful, portable form.
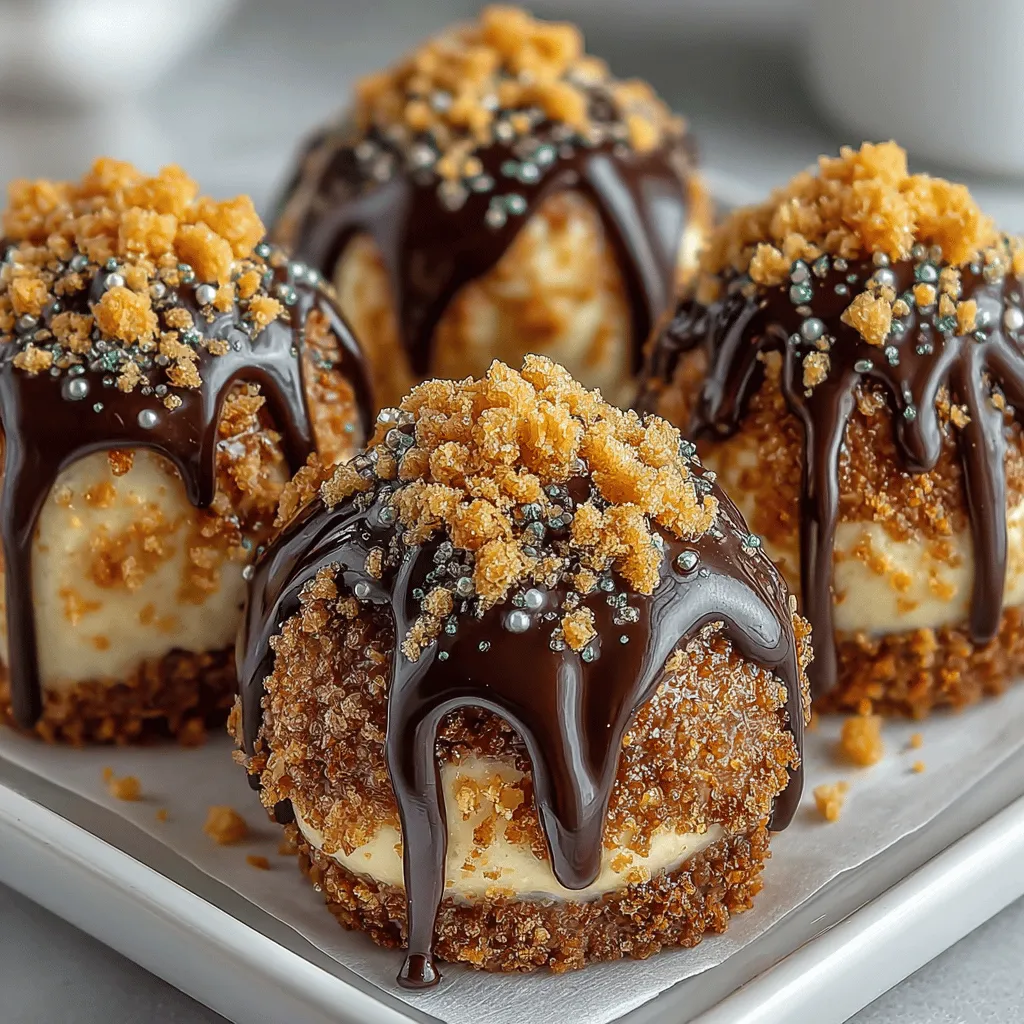
At the heart of this recipe are two star ingredients: cookie butter and cream cheese. Cookie butter, with its rich and spiced flavor profile, adds a unique dimension to the classic cheesecake taste. When combined with the creamy texture of cream cheese, it creates a heavenly combination that is both decadent and satisfying. The contrast of flavors and textures is what makes these No-Bake Cookie Butter Cheesecake Bombs a must-try for anyone craving a sweet treat.
The purpose of this article is to guide you through a step-by-step process for making these delightful cheesecake bombs. Whether you’re preparing them for a special occasion or simply indulging yourself, this recipe will help you create a dessert that is sure to impress.
Understanding the Ingredients
Before diving into the preparation of No-Bake Cookie Butter Cheesecake Bombs, it’s essential to understand the key ingredients that contribute to their deliciousness. Each component plays a crucial role in achieving the perfect flavor, texture, and overall experience.
– Cream Cheese: The foundation of any cheesecake, cream cheese provides the rich and creamy texture that we all love. For the best results, make sure to use full-fat cream cheese, as it yields a smoother and more decadent filling.
– Cookie Butter: This is the star ingredient of our cheesecake bombs. Made primarily from crushed cookies blended with oils and spices, cookie butter adds a sweet, slightly spiced flavor that is both comforting and addictive. Its creamy consistency perfectly complements the cream cheese, creating a luscious filling.
– Powdered Sugar: To achieve the right level of sweetness and a smooth consistency, powdered sugar is used in this recipe. It dissolves easily, ensuring that your cheesecake mixture is free from any gritty texture.
– Whipped Cream: Incorporating whipped cream into the cheesecake mixture adds lightness and fluffiness, making each bite feel indulgent yet airy. This step is crucial for achieving the perfect balance between decadence and lightness.
– Crushed Graham Crackers: To create the classic cheesecake crust texture, crushed graham crackers are used. They provide a crunchy element that contrasts beautifully with the creamy filling.
– Chocolate Chips and Coconut Oil: These ingredients are used for coating the cheesecake bombs. The chocolate coating not only adds an extra layer of flavor but also gives the bombs an appealing finish. Coconut oil helps the chocolate melt smoothly and harden into a beautiful shell.
Ingredient Substitutes
If you have dietary restrictions or preferences, there are several substitutes you can consider. For a vegan variation, you can use vegan cream cheese and whipped coconut cream instead of traditional cream cheese and whipped cream. To make the recipe gluten-free, opt for gluten-free graham crackers and ensure that your cookie butter is gluten-free as well.
Step-by-Step Instructions for No-Bake Cookie Butter Cheesecake Bombs
Preparing the Cheesecake Mixture
To start, gather all your ingredients and find a mixing bowl. Begin by taking the cream cheese out of the refrigerator and allowing it to soften at room temperature for about 30 minutes. This step is essential as it ensures that the cream cheese blends smoothly with the other ingredients, resulting in a creamy filling.
Once the cream cheese is softened, add in the cookie butter and powdered sugar. Using an electric mixer, beat the mixture on medium speed until it becomes smooth and well combined. The goal is to achieve a creamy consistency without any lumps. This should take about 2-3 minutes.
Folding in the Whipped Cream
Next, it’s time to incorporate the whipped cream into your cheesecake mixture. This step is crucial for achieving that light and fluffy texture that makes these cheesecake bombs so delightful.
First, prepare your whipped cream, either by whipping heavy cream until stiff peaks form or using store-bought whipped cream. If you’re making your own, be careful not to over-whip it, as this can lead to a grainy texture.
Gently fold the whipped cream into the cheesecake mixture using a spatula. Start by adding about a third of the whipped cream to lighten the mixture, and then gradually fold in the remaining whipped cream. The key here is to be gentle; you want to maintain the airiness of the whipped cream while fully incorporating it into the cheesecake mixture.
Chilling the Mixture
Once you have achieved a smooth and fluffy cheesecake mixture, it’s important to chill it before forming the bombs. Transfer the mixture to a covered container and place it in the refrigerator for at least 30 minutes. Chilling not only helps the mixture firm up, making it easier to scoop, but also allows the flavors to meld together beautifully.
Forming the Bombs
After the chilling period, it’s time to form your cheesecake bombs. Using a cookie scoop or a tablespoon, portion out the chilled cheesecake mixture and roll it into balls with your hands. The ideal size is about one inch in diameter, which makes them bite-sized and easy to enjoy.
Once you have rolled all the cheesecake bombs, place them on a parchment-lined baking sheet. This will prevent them from sticking and make cleanup easier. After all the bombs are formed, return them to the refrigerator for another 15-20 minutes to firm up further before coating them in chocolate.
Stay tuned for the next part of this article, where we will cover the chocolate coating process and how to finish off your No-Bake Cookie Butter Cheesecake Bombs.
Sizing and Shaping the Cheesecake Balls
Once your cheesecake mixture is ready, it’s time to shape it into delightful little balls. For a consistent size, aim for about one-inch balls. This size is perfect for a bite-sized treat that packs a flavor punch without being overwhelming. To create uniform balls, use a cookie scoop or simply your hands, which can be lightly greased with cooking spray to prevent sticking.
Begin by scooping out a tablespoon of the cheesecake mixture and rolling it into a ball between your palms. If the mixture is too soft, you might want to chill it for a short period to make shaping easier. Once all your balls are formed, place them on a parchment-lined baking sheet. This will make transferring them easier when it’s time to coat them in chocolate.
Chilling Again
Purpose of the Second Chill for Firmness Before Coating
After shaping the cheesecake balls, they need to chill again. This second chilling step is crucial for ensuring that the cheesecake bombs hold their shape during the chocolate coating process. Place the formed balls back in the refrigerator for at least 30 minutes. If you have more time, an hour is even better. The cooler temperature will firm up the cream cheese and cookie butter mixture, making it easier to handle and dip into the melted chocolate.
Melting the Chocolate
Tips for Achieving the Perfect Melted Chocolate Consistency
While the cheesecake balls are chilling, it’s time to prepare the chocolate coating. Choose high-quality chocolate chips or a chocolate bar for melting. You can use either dark, milk, or white chocolate based on your preference.
To melt the chocolate, you have two popular methods: using a microwave or a double boiler. If using the microwave, heat the chocolate in 30-second intervals, stirring in between until smooth. Be careful not to overheat the chocolate, as this can cause it to seize up.
If you prefer the double boiler method, fill a pot with water and bring it to a simmer. Place a heat-proof bowl on top of the pot, ensuring it does not touch the water. Add the chocolate to the bowl and stir until melted and creamy.
For both methods, consider adding a teaspoon of coconut oil or vegetable oil to the chocolate. This will help create a smoother consistency, making it easier to coat the cheesecake bombs.
Coating the Bombs
Techniques for Dipping and Ensuring an Even Coat
Once your chocolate is melted and at the right consistency, it’s time to coat the cheesecake bombs. Using a fork or a dipping tool, carefully lower each cheesecake ball into the melted chocolate. Swirl it around to ensure it’s fully covered, then lift it out and tap the fork against the edge of the bowl to allow excess chocolate to drip off.
Make sure to work quickly, as the chocolate will begin to set as it cools. If you find the chocolate begins to thicken, simply return it to the heat source briefly to re-melt.
Optional Rolling in Crushed Graham Crackers for Added Texture
For an extra touch of flavor and texture, consider rolling the coated cheesecake bombs in crushed graham crackers after dipping them in chocolate. This step not only adds a delightful crunch but also enhances the cookie butter flavor, creating a delicious contrast with the creamy cheesecake center.
To do this, simply place crushed graham crackers in a shallow bowl. After coating each cheesecake bomb in chocolate, roll it in the crushed graham crackers before placing it back on the parchment-lined baking sheet.
Setting the Cheesecake Bombs
Importance of Allowing the Chocolate to Harden Properly
After coating your cheesecake bombs, it’s essential to let them set properly. Allow the chocolate to harden at room temperature for about 30 minutes, or you can place them back in the refrigerator for quicker setting. Properly hardened chocolate will provide that satisfying snap when bitten into and will keep the cheesecake filling safe and secure.
Serving Suggestions
Creative Ideas for Serving the Cheesecake Bombs
When it comes to serving your No-Bake Cookie Butter Cheesecake Bombs, the possibilities are endless. They can be enjoyed as a delightful dessert or as a sweet snack. You can present them in various ways depending on the occasion.
– Pairing with Fresh Fruits or Sauces: Serve the cheesecake bombs alongside fresh fruits like strawberries, raspberries, or banana slices for a refreshing contrast. Drizzling some chocolate sauce, caramel, or even a berry compote can elevate the dish, adding a gourmet touch.
– Presentation Ideas for Parties or Gatherings: Arrange the bombs on a colorful platter or tiered cake stand for an impressive display. You can also use decorative cupcake liners for a more elegant presentation. Consider garnishing the platter with mint leaves or edible flowers to add a pop of color.
– Discussing Occasions Where These Treats Shine: These cheesecake bombs are perfect for birthdays, holiday celebrations, or casual gatherings with friends. They make excellent party favors, and their bite-sized nature allows guests to enjoy them without the need for utensils.
Nutritional Information
Breakdown of Nutritional Values per Serving
Understanding the nutritional content of your treats is essential for enjoying them in moderation. Each No-Bake Cookie Butter Cheesecake Bomb contains approximately 150-200 calories, depending on the specific ingredients used.
– Calories: 150-200
– Fat: 10-12g
– Carbohydrates: 15-20g
– Sugars: 10-14g
– Protein: 2-4g
These values can vary based on the chocolate and cookie butter brands you choose. While these cheesecake bombs are indulgent, they can be enjoyed as a special treat when balanced with a healthy diet.
Discussion on the Balance of Indulgence and Moderation
Desserts are an integral part of many cultures, and enjoying them in moderation is key. These cheesecake bombs offer a delicious way to satisfy your sweet tooth without overindulging. Pairing them with fresh fruits can add nutritional value and balance the richness of the cheesecake.
Conclusion
In conclusion, making No-Bake Cookie Butter Cheesecake Bombs is a delightful and straightforward process that results in a scrumptious treat everyone will love. These little bites of joy are not only indulgent but also versatile, allowing you to experiment with various flavors and toppings to suit your palate.
Whether you serve them at a gathering, as a special treat for yourself, or share them with loved ones, these cheesecake bombs are sure to impress. The simple steps and minimal ingredients make it a recipe that can easily become a staple in your dessert repertoire.
So, gather your ingredients and give these cheesecake bombs a try. You might just find that they become a cherished favorite in your household! Enjoy the satisfaction of creating homemade treats that bring smiles and sweet moments to those around you.
