Cheddar Chili Biscuit Sliders: A Comfort Food Delight
Sliders have become a staple in casual dining and social gatherings, offering a delightful way to enjoy favorite flavors in bite-sized portions. Their popularity is rooted in their versatility and the ability to cater to diverse palates, making them an ideal choice for parties, game days, or any casual meal. Among the myriad of slider options, Cheddar Chili Biscuit Sliders stand out as a unique fusion of comfort food that elevates the humble slider to new culinary heights.
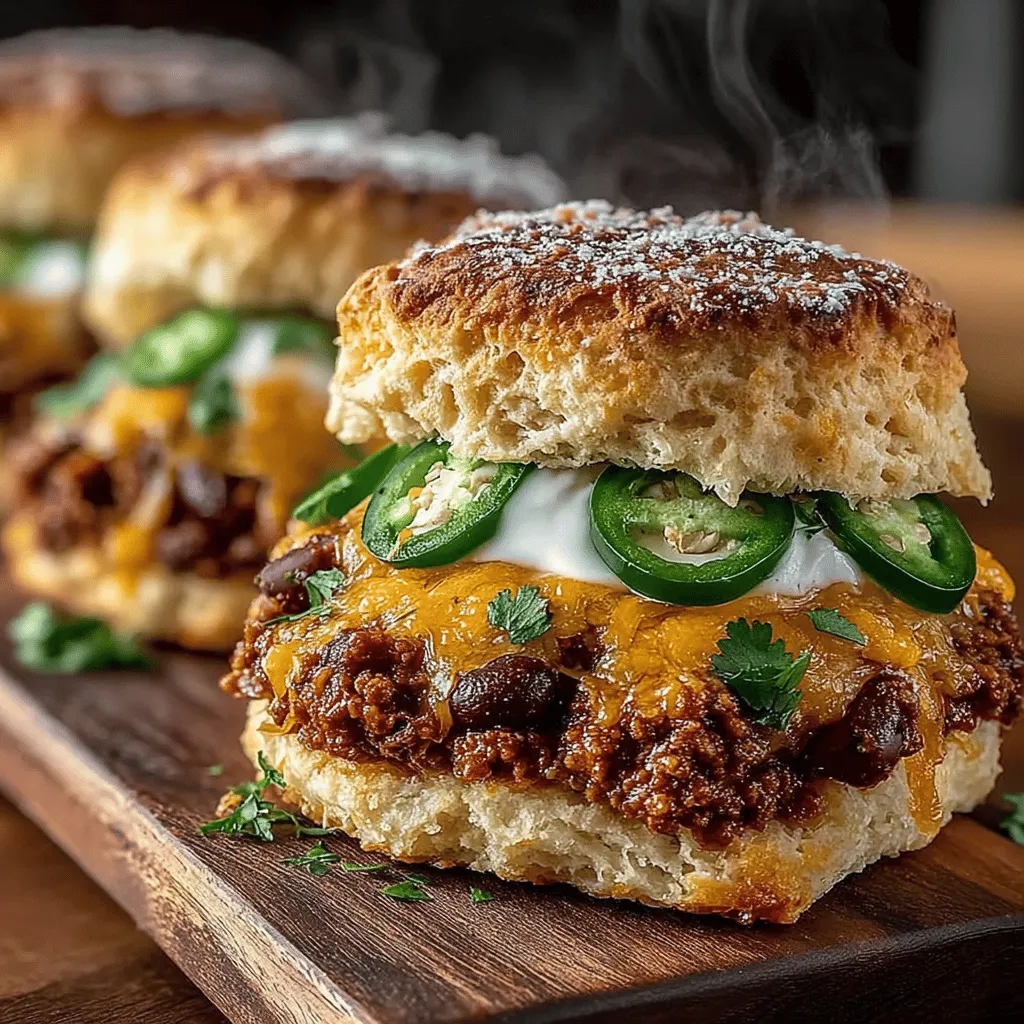
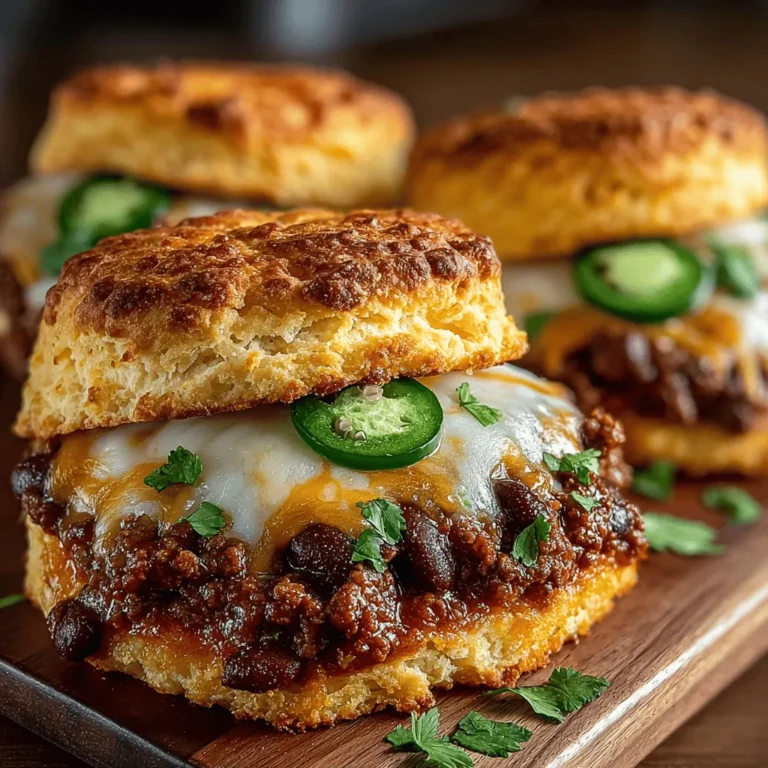
The Cheddar Chili Biscuit Sliders combine the rich, cheesy goodness of cheddar biscuits with a hearty, flavorful chili, creating a perfect balance of flavors and textures. The buttery, flaky biscuits serve as a satisfying base, while the spicy chili adds warmth and depth, creating a mouthwatering experience with each bite. This dish not only satisfies hunger but also brings a sense of nostalgia, reminiscent of cozy family gatherings where comfort food reigns supreme.
Understanding the Ingredients
To craft the perfect Cheddar Chili Biscuit Sliders, it’s essential to focus on the quality and flavor of each ingredient. The primary components of this recipe include:
1. Biscuits: The foundation of the sliders, biscuits should be light, flaky, and packed with flavor. Homemade biscuits not only enhance the overall taste but also provide a satisfying texture that can hold up against the chili.
2. Chili: The heart of the slider, the chili introduces bold flavors and a satisfying protein source. Whether you opt for beef, turkey, or a vegetarian version, the chili should be well-seasoned and rich to complement the biscuits.
3. Assembly and Garnishing Options: Once the biscuits and chili are prepared, assembling the sliders allows for creativity. Consider toppings such as sour cream, fresh herbs, or sliced jalapeños to enhance the dish further.
Using quality ingredients is paramount for achieving an optimal flavor profile in your Cheddar Chili Biscuit Sliders. Fresh cheese, high-quality meats, and fragrant spices will elevate the dish and create a memorable dining experience.
Crafting the Perfect Biscuits
The cornerstone of any great slider is the biscuit, and for Cheddar Chili Biscuit Sliders, homemade biscuits are non-negotiable. Here’s a detailed guide on how to make the perfect biscuits that will serve as the ideal vehicle for your chili.
Ingredients for the Biscuits
– All-Purpose Flour: The main ingredient that provides structure to the biscuits.
– Baking Powder: This leavening agent is essential for achieving the light and fluffy texture.
– Butter: Cold, unsalted butter is crucial for creating flaky layers. The fat in the butter contributes to the richness and tenderness of the biscuits.
– Shredded Cheddar Cheese: Adds a savory flavor and gooeyness that complements the chili.
– Milk: Provides moisture to the dough and helps bind the ingredients together.
Step-by-Step Process
1. Mixing the Dry Ingredients: In a large mixing bowl, combine the all-purpose flour and baking powder. Use a whisk to ensure that the baking powder is evenly distributed throughout the flour, which is vital for uniform rising during baking.
2. Incorporating the Butter: Cut the cold butter into small cubes and add it to the flour mixture. Using a pastry cutter or your fingers, work the butter into the flour until the mixture resembles coarse crumbs. This step is crucial for creating the flaky layers in the biscuits, so be careful not to overwork the dough.
3. Adding Cheese and Milk: Gently fold in the shredded cheddar cheese, making sure it is evenly distributed. Create a well in the center of the mixture and pour in the milk. Using a spatula, mix until just combined. The key here is to avoid overmixing, which can lead to tough biscuits.
4. Shaping the Biscuits: Turn the dough out onto a lightly floured surface. Knead it gently a few times until it comes together, then pat it into a rectangle about 1-inch thick. Use a biscuit cutter or a sharp knife to cut out the biscuits. Aim for even sizes to ensure uniform baking.
5. Baking the Biscuits: Preheat your oven to 425°F (220°C). Place the cut biscuits on a baking sheet lined with parchment paper, ensuring they are close together but not touching. This helps them rise nicely. Bake for 12-15 minutes or until they are golden brown on top.
6. Cooling: Once baked, remove the biscuits from the oven and allow them to cool on a wire rack. This step is essential to maintain their texture and prevent sogginess when assembled with the chili.
By following these steps, you will create biscuits that are light, flaky, and bursting with cheesy goodness. These biscuits will not only complement the chili but also stand alone as a delicious snack or side dish.
Creating Flavorful Chili
The chili is a critical component of the Cheddar Chili Biscuit Sliders, bringing a robust flavor profile that pairs beautifully with the buttery biscuits. A well-crafted chili can elevate the sliders from simple to extraordinary, providing a rich contrast to the lightness of the biscuits.
Overview of Chili Ingredients
1. Ground Beef or Turkey: The primary protein source in the chili, providing a savory base that enhances the overall flavor. Ground turkey offers a leaner option without sacrificing taste.
2. Beans: Adding beans to the chili not only boosts the fiber content but also contributes to a heartier texture. Choose your favorite variety, such as kidney or black beans.
3. Tomatoes: Canned diced tomatoes or tomato sauce bring acidity and sweetness to the chili, balancing the richness of the meat.
4. Spices: A blend of spices such as chili powder, cumin, and paprika adds depth and complexity, ensuring the chili is bursting with flavor.
5. Onions and Garlic: Aromatics like onions and garlic are essential for building the foundation of the chili’s flavor.
As you prepare your chili, remember that the balance of flavors is crucial. Each ingredient plays a role in creating a harmonious dish that complements the biscuits perfectly. With the right combination of spices and quality ingredients, your chili will be the star of the show.
Stay tuned for the next part of this article, where we will delve deeper into the chili-making process and explore the various ways to assemble and garnish your Cheddar Chili Biscuit Sliders for an unforgettable culinary experience.

When it comes to flavorful gatherings, few dishes can compete with the tantalizing blend of spices, textures, and aromas that come together in Cheddar Chili Biscuit Sliders. These sliders are not only easy to make, but they also offer a delightful twist on traditional chili, served in a way that’s perfect for parties or cozy family dinners. Let’s dive into the heart of this recipe, focusing on how to cook the chili, assemble the sliders, and serve them for maximum appeal.
Beans and Tomatoes: Adding Texture and Heartiness
The foundation of any great chili lies in its ingredients. Beans and tomatoes play a crucial role in adding both texture and heartiness to our Cheddar Chili Biscuit Sliders. Using a combination of black beans and kidney beans not only provides protein but also contributes to a creamy texture that beautifully complements the spicy chili. The addition of diced tomatoes enhances the overall flavor profile, creating a rich, savory base for the sliders. This combination not only fills you up but also adds a vibrant color to the dish, making it visually appealing.
Spices: Enhancing the Overall Taste
Spices are the secret weapon in any chili recipe, elevating flavors and transforming simple ingredients into a mouthwatering dish. For our Cheddar Chili Biscuit Sliders, we recommend using a balanced blend of chili powder, cumin, paprika, and a touch of cayenne pepper for a kick. These spices work together to create a deep, warm flavor that permeates the meat and beans. Don’t forget to adjust the spice levels according to your preference; if you enjoy a milder chili, reduce the cayenne pepper, or if you crave more heat, feel free to add extra!
Detailed Instructions for Cooking the Chili
Importance of Sautéing Onion and Garlic for Flavor Development
The aromatic base of any good chili begins with sautéing onion and garlic. This step is crucial as it builds depth in flavor. As the onion becomes translucent and the garlic turns fragrant, they release essential oils that form the backbone of your chili.
Step-by-Step Guide on Browning the Meat and Simmering the Chili
1. Gather Ingredients: Start with 1 pound of ground beef or turkey, 1 can of black beans (drained and rinsed), 1 can of kidney beans (drained and rinsed), 1 can of diced tomatoes (with juice), and your spice mix (chili powder, cumin, paprika, cayenne pepper, salt, and pepper).
2. Sauté the Aromatics: In a large pot or Dutch oven, add 1 tablespoon of olive oil over medium heat. Once hot, add 1 chopped onion and sauté for about 3-5 minutes until soft. Add 3 cloves of minced garlic and cook for an additional minute, stirring frequently to avoid burning.
3. Brown the Meat: Increase the heat to medium-high and add the ground meat to the pot. Use a wooden spoon to break it apart, cooking until it’s browned, about 5-7 minutes. Make sure to season it lightly with salt and pepper as it cooks.
4. Add the Beans and Tomatoes: Once the meat is browned, stir in the black beans, kidney beans, and diced tomatoes. Mix well to combine all ingredients.
5. Incorporate the Spices: Sprinkle the chili powder, cumin, paprika, cayenne pepper, and any additional seasonings you prefer over the mixture. Stir well to ensure the spices are evenly distributed.
6. Simmer the Chili: Reduce the heat to low, cover the pot, and let it simmer for at least 20-30 minutes. This allows the flavors to meld beautifully. Stir occasionally and taste, adjusting the seasonings as necessary.
Once your chili is cooked to perfection, you’ll be ready to assemble those delicious sliders.
Assembling the Sliders
Importance of Proper Assembly for Presentation and Taste
The way you assemble your sliders can greatly influence both their presentation and flavor. A well-layered slider not only looks appealing but also ensures that each bite is a perfect combination of flavors.
Step-by-Step Instructions for Assembling the Sliders
1. Prepare the Biscuits: Preheat your oven according to the biscuit package instructions. Bake the biscuits until they are golden brown, then remove them from the oven and allow them to cool slightly.
2. Cut the Biscuits: Once cooled, slice each biscuit in half horizontally. This will create the top and bottom for your sliders.
3. Layer the Chili: Spoon a generous amount of the chili onto the bottom half of each biscuit. Ensure that each slider is loaded with a hearty portion to maximize flavor.
4. Add Jalapeños: For an extra kick, add sliced jalapeños on top of the chili. This step is optional, but it adds a fantastic crunch and spice.
5. Garnish with Cilantro or Parsley: Finish off each slider with a sprinkle of fresh cilantro or parsley for a pop of color and freshness. This not only enhances the flavor but also adds a beautiful touch to your presentation.
6. Top with the Biscuit Half: Gently place the top half of the biscuit over the chili and jalapeños to complete your sliders.
Suggestions for Serving and Presentation
To present your Cheddar Chili Biscuit Sliders, consider serving them on a rustic wooden board or a colorful platter. You can also add small toothpicks to hold them together for easy handling. Pair these sliders with a side of crispy tortilla chips or a fresh salad to create a balanced meal.
Serving Suggestions
Ideas for Complementing Sides That Pair Well with the Sliders
When it comes to sides, you want to complement the bold flavors of the chili sliders without overpowering them. Here are a few ideas:
– Cornbread: A classic pairing, cornbread adds a sweet and crumbly texture that balances the spiciness of the chili.
– Coleslaw: A tangy and crunchy coleslaw can provide a refreshing contrast to the rich flavors of the sliders.
– Grilled Vegetables: Lightly seasoned grilled veggies make a healthy addition that adds color and nutrition to your meal.
Discussion on Variations and Customizations
One of the best aspects of Cheddar Chili Biscuit Sliders is their versatility. Here are some ways to customize this dish to fit various dietary preferences:
– Vegetarian Options: Replace the ground meat with lentils or a plant-based protein like crumbled tofu or tempeh. You can also add extra beans and vegetables for a hearty vegetarian chili.
– Spice Levels: Adjust the heat according to your preference. For milder sliders, use less cayenne pepper and opt for sweet bell peppers instead of jalapeños.
– Gluten-Free Alternatives: Use gluten-free biscuits or make your own using almond flour or another gluten-free flour blend to accommodate dietary restrictions.
Suggestions for Beverages That Would Pair Nicely
Pair your Cheddar Chili Biscuit Sliders with something refreshing. Here are some great drink options:
– Craft Beer: A cold craft beer, especially an IPA or a stout, complements the rich flavors of the chili.
– Iced Tea: Unsweetened iced tea or a fruity iced tea can provide a refreshing contrast.
– Sparkling Water: For a lighter option, serve sparkling water with a slice of lime for a crisp finish.
Nutritional Information
Overview of the Nutritional Benefits of the Sliders
These Cheddar Chili Biscuit Sliders are not only delicious but can also be a nutritious choice. Loaded with protein from the beans and meat, they offer significant fiber, essential for digestion. The tomatoes provide vitamins A and C, contributing to overall health, while the spices may have anti-inflammatory properties.
Considerations for Dietary Restrictions
If you’re mindful of dietary restrictions, consider these alternatives:
– Gluten-Free Options: Using gluten-free biscuits ensures that those with gluten sensitivities can enjoy this dish.
– Low-Carb Alternatives: For a low-carb option, consider serving the chili over lettuce cups instead of biscuits, or use a cauliflower biscuit recipe.
Conclusion
Cheddar Chili Biscuit Sliders are a delightful dish that brings comfort and flavor to any gathering. With their hearty chili filling nestled between buttery biscuits, they are sure to impress your guests and become a favorite in your recipe rotation.
Whether you stick to the classic recipe or experiment with variations, these sliders offer endless possibilities for customization. Enjoy the process of cooking and the joy of sharing this flavorful dish with loved ones. Remember, the kitchen is a place for creativity, so don’t hesitate to make this recipe your own!


